Style by Stephmodo
Today readers, I’m really excited to feature a design DIY […]
Today readers, I’m really excited to feature a design DIY from a well known blogger and style goddess.
Stephanie, author of the popular lifestyle blog, Stephmodo, provides her readers a peak into her fabulous life through recipes, house tours, DIYs, great finds online and more. I love her tag line, Where Practical Meets Pretty. This quick and easy project is a great idea for a playroom, and Stephanie explains what she did below.
 Playroom organization was becoming a bit of a problem around here due to the young ages of my last two children. When it came time to play the “clean up game a la Barney,” the wee ones didn’t know what that meant exactly. So, they basically just shoved the toys in any available bin, basket, drawer, closet, corner, etc. The results? A larger mess than before we started. 🙂
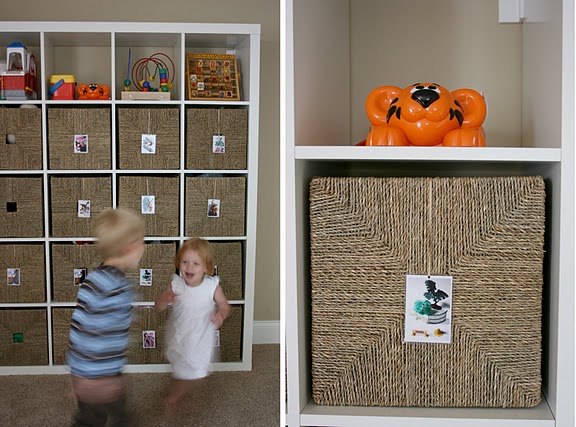
I decided to try something I’d read years ago in a magazine (forgive me…I have no recollection which title it was) about taking pictures of toys with a Polaroid and then adhering them to the storage tote (gone is my Polaroid sadly, but I do have a camera still). This was sheer brilliance to me and perfect for anyone who has a child that doesn’t read quite yet. It seems to make my kids feel more confident when they are presented with a simple way to accomplish something. Also, when you have visitors over for a playdate and it’s time to pick up, this method also makes it easy on the kids and their moms. I know that when I’ve been to others’ homes and want to help pick up, I sometimes feel at a loss because I’m not sure how things are organized. I’d love a little picture to give me some clues.
We bought an IKEA bookcase, bolted it to the wall, and then purchased some grass baskets at IKEA as well. These were our second choice as they didn’t have the ones we originally selected at our local store. We haven’t filled up all the bins yet (we are somewhat slow at acquiring toys around here) so we have a few empty ones just waiting for Christmas to arrive. Grandparents seem to be good for that sort of thing. 🙂 If I had more of a certain toy than could fit in one basket, I used two baskets with two of the same labels. For example, we have a lot of teddy bears and girly dress ups for some reason; so I have two bins labeled with a dress up tag and two with a teddy bear tag.
To take the images, I placed groupings of toys on a white table I found in the IKEA “As-Is” section. It’s already in the playroom/living room so that made it easy on me! I took pictures with a digital camera of the groupings and then fiddled with them a little in Photoshop. Then, I uploaded them to an online photo processing site (I used Costco’s) and selected the “wallet size” option for printing. I picked up the wallet size prints, went to FedEx/Kindos, and ran them through the self-use laminating machine using the heaviest weight plastic available. When they cooled, I trimmed them to size using a basic paper cutter from a craft store. After punching a hold in the top of the label and running a little ribbon through it, they were ready to hang.
While there are more than a few steps here, it wasn’t a difficult process per se. All of the places I visited and supplies I used are readily available to just about anyone. Here are a few examples to get those wheels turning:
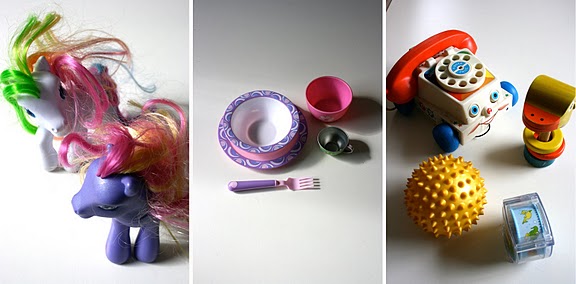 1. My Little Ponies 2. tea sets 3. infant toys

4. cars + trucks 5. accessories for their “town” set up 6. trains + tracks
 7. dress ups for girls 8. dress ups for dolls (many of which were mine as a child—thanks Mom for keeping those) 9. dress ups for boys (cowboy, pilot, fireman, etc.)
 10. plush animals that aren’t teddy bears 11. farm animals + those that could in theory eat those very farm animals 🙂 12. teddy bears of all shapes and sizes

Thanks Stephanie! Please make sure to check out her blog, for more great tips and lovelies.